

How to change a sewing machine needle comes down to five quick steps once you know them: turn off the machine, loosen the clamp, remove the old needle, insert the new one the correct way, and tighten. Whether you’re searching for how to replace a sewing machine needle after a snap mid-project, or just keeping up with routine maintenance, the process takes under two minutes once you’ve done it a time or two. This guide covers the full step-by-step method, how to tell your needle actually needs changing, and which direction it goes in a detail that trips up more people than the rest of the process combined.
Table of Contents
Quick Answer
To change a sewing machine needle, turn off the machine, raise the needle to its highest position, loosen the needle clamp screw, and pull the old needle down and out. Insert the new needle with the flat side of the shank facing the back of the machine, push it up as far as it will go, and tighten the clamp screw. Rethread the machine and test on a fabric scrap before starting your project.
Signs It’s Time to Change Your Needle
A needle rarely announces itself clearly, but a few signs are worth watching for. Skipped stitches, visible thread fraying, small pulls or snags in your fabric, and a faint popping sound as the needle passes through the material are all signs of a dull or damaged point. A bent needle is usually easier to spot — roll it on a flat surface and watch for a wobble.
How Often Should You Change a Sewing Machine Needle?
A good rule of thumb is to replace your needle after every 8 to 10 hours of sewing time, or with the start of every new project, whichever comes first. Switching to a noticeably different fabric — moving from quilting cotton to denim, for example — is also a good natural point to put in a fresh, fabric-appropriate needle rather than waiting for a problem to show up.
Tools You’ll Need
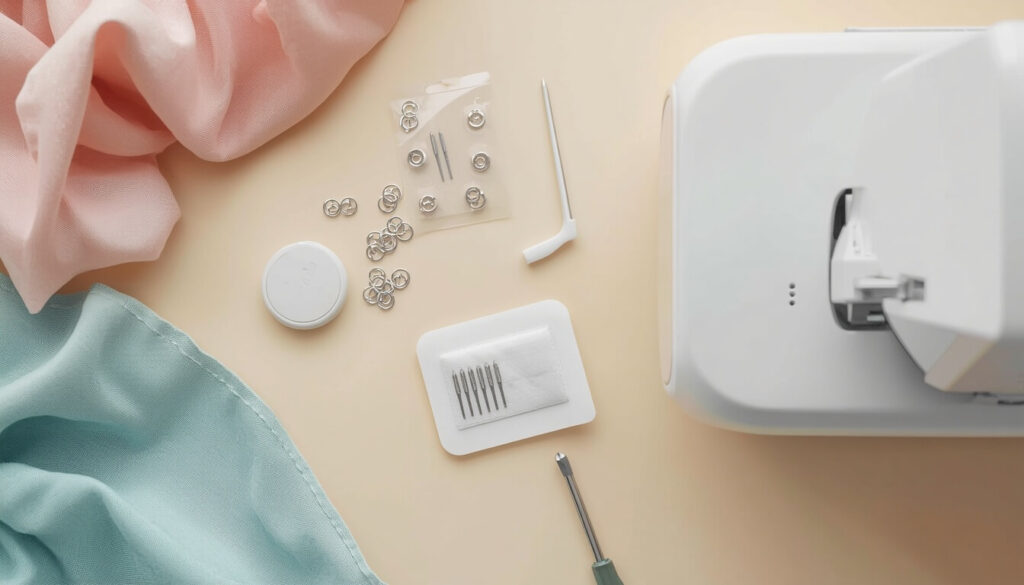
- A new needle, correctly sized for your fabric
- A small screwdriver, if your machine’s clamp doesn’t loosen by hand
- A piece of paper or light fabric scrap, to cover the needle plate opening
- Optional: a needle inserter tool, which makes gripping a small needle easier
How to Change a Sewing Machine Needle: Step-by-Step
Step 1 — Turn Off the Machine and Prep
Turn off your machine completely before touching the needle area — this is a genuine safety step, not just a formality, since an accidental bump of the foot pedal with your fingers near the needle can cause an injury. Lay a piece of paper or a scrap of fabric over the needle plate opening so a dropped needle can’t fall into the machine’s internals.
Step 2 — Raise the Needle and Loosen the Clamp
Turn the hand wheel to bring the needle to its highest position, which gives you the most room to work. Loosen the needle clamp screw, usually located just above the needle, turning it counterclockwise until it’s loose enough to release the needle.
Step 3 — Remove the Old Needle
Hold the needle with one hand as you finish loosening the screw, then pull it straight down and out of the clamp. Dispose of it safely — a needle recycling container or a sealed container made for sharps works well.
Step 4 — Insert the New Needle (Flat Side Direction)
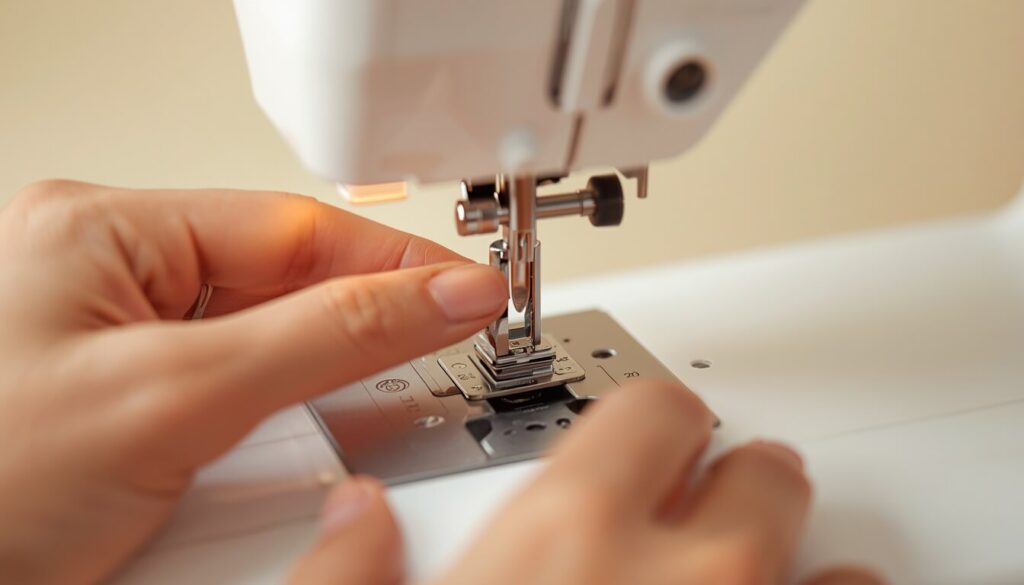
Check your new needle for a bend before inserting it, rolling it on a flat surface if you’re unsure. Push it up into the clamp as far as it will go, with the flat side of the shank facing the back of the machine — this is the detail covered in more depth below, since it’s the single most common sticking point for anyone learning how to change the needle on a sewing machine for the first time.
Step 5 — Tighten and Rethread
Tighten the clamp screw until it’s snug — finger-tight is usually enough, and over-tightening can make the screw harder to loosen next time. Rethread your machine from the spool through to the needle’s eye, and test on a fabric scrap before moving on to your actual project.
Which Way Does a Sewing Machine Needle Go In?
According to Wikipedia, most domestic sewing machines use a standardized needle system with a flat-sided shank, designed specifically so the needle can only be inserted correctly one way. That flat side faces the back of the machine on nearly every home sewing machine, while the rounded side faces forward, toward you.
If you’ve inserted the needle correctly, it should sit flush against the clamp with no gap or wobble. A needle that doesn’t push all the way up, or that won’t let the clamp screw tighten properly, is usually facing the wrong direction or isn’t seated high enough in the clamp.
Choosing the Right Needle Before You Start
Before you replace a needle, it helps to know you’re putting in the right one for your fabric and thread. Our guides on sewing machine needle sizes, whether sewing machine needles are universal, and what sewing machine needle numbers mean cover that selection process in detail, so you’re not guessing at the numbers stamped on the shank.
If Your Needle Keeps Breaking
If you’re replacing needles far more often than every 8 to 10 hours of sewing, something beyond normal wear is likely going on. Our dedicated guide on why your sewing machine needle keeps breaking walks through the common causes, from an incorrect needle size to a timing issue.
Common Mistakes to Avoid
- Leaving the machine turned on while working near the needle
- Inserting the needle with the flat side facing the wrong direction
- Not pushing the needle all the way up into the clamp before tightening
- Over-tightening the clamp screw, which can make future changes harder
- Skipping the fabric scrap test before starting a real project
- Reusing a needle that’s clearly bent or dull instead of replacing it
FAQs
How do I know when to replace a sewing machine needle?
Watch for skipped stitches, fraying thread, small snags in your fabric, or a popping sound as the needle passes through the material. A bent needle will usually wobble visibly if you roll it on a flat surface.
How often should you change a sewing machine needle?
A good rule of thumb is every 8 to 10 hours of sewing time, or at the start of each new project, whichever comes first. Switching to a very different fabric type is also a good natural point to put in a fresh needle.
Which way does a sewing machine needle go in?
On nearly every home sewing machine, the flat side of the needle’s shank faces the back of the machine, with the rounded side facing forward. This is a standardized design so the needle can only be inserted correctly in one orientation.
What tools do I need to change sewing machine needle parts myself?
Just a new needle and, on some machines, a small screwdriver if the clamp doesn’t loosen by hand. A needle inserter tool is optional but makes gripping a small needle easier, especially for anyone with limited hand dexterity.
Can I change the needle on a sewing machine without a manual?
Yes, the general process is the same across nearly all home machines turn off the machine, loosen the clamp, remove the old needle, insert the new one flat-side-back, and tighten. Model-specific quirks are rare, but checking your manual is still worth doing if something feels unusually stiff or different.
Is it hard to replace the needle in a sewing machine for the first time?
Not really most people find it quick and straightforward after the first attempt, even without prior experience. The one detail worth double-checking is the flat side orientation, since that’s the step most likely to trip up a first-timer.
Conclusion
Once you’ve learned how to change a sewing machine needle, it becomes a quick, almost automatic part of starting any new project rather than something that requires the manual every time. The flat-side orientation is the one detail worth slowing down for — get that right, and the rest of the process takes well under two minutes.
If your needle seems to need replacing far more often than it should, our guide on why your sewing machine needle keeps breaking can help track down the underlying cause.