

How to insert a sewing machine needle correctly comes down to one small detail that causes most of the frustration: which way the flat side faces. Get that wrong, and even a brand-new, perfectly sharp needle will skip stitches or refuse to sew at all. This guide covers the mechanics behind why orientation matters, the step-by-step insertion process, a real exception worth knowing about, and how to troubleshoot a needle that won’t sit right.
Table of Contents
Quick Answer
To insert a sewing machine needle, raise the needle bar to its highest position, loosen the clamp screw, and slide the new needle up as far as it will go with the flat side of the shank facing the back of the machine. Tighten the clamp screw securely, then turn the hand wheel by hand one full rotation to confirm the needle moves freely before you plug the machine back in or sew.
Why Needle Orientation Actually Matters
A sewing machine needle isn’t just a sharp point — the small indentation behind the eye, called the scarf, has to line up precisely with the machine’s hook for a stitch to form at all. According to Wikipedia, a lockstitch forms when the needle thread loops behind the needle and a hook catches that loop to interlock it with the bobbin thread beneath the fabric.
That hook has to pass through the exact spot where the scarf creates clearance for it. Insert the needle with the flat side facing the wrong direction, and the scarf ends up facing away from the hook instead of toward it, so the hook misses the thread loop entirely — which is exactly why a needle inserted backward produces skipped stitches rather than no stitches at all.
How to Insert a Sewing Machine Needle: Step-by-Step
Step 1 — Position the Needle Bar
Turn your machine’s hand wheel toward you until the needle bar reaches its highest point. This isn’t optional — inserting a needle with the bar partway down means it won’t seat fully, even if everything else is correct.
Step 2 — Find the Flat Side
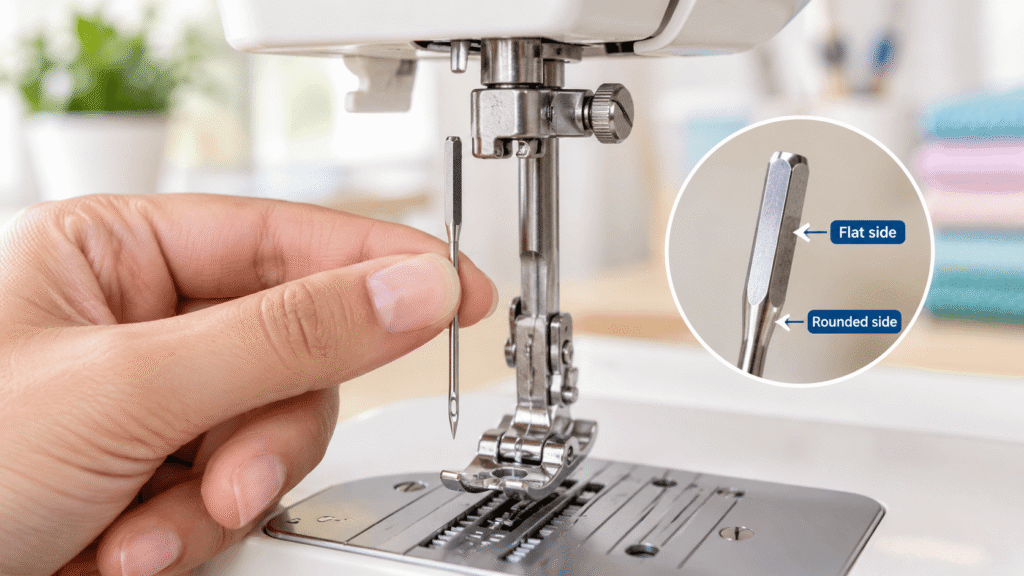
Look at the needle’s shank, the thicker section at the top. One side is flat and one is rounded. On nearly every domestic sewing machine, that flat side needs to face the back of the machine once inserted.
Step 3 — Push Up to the Stopper Pin
Slide the needle up into the clamp until it stops against a small internal pin — you’ll feel it reach a hard stop. A needle that isn’t pushed all the way up will still fit in the clamp, but it sits too low, which throws off the whole system’s timing.
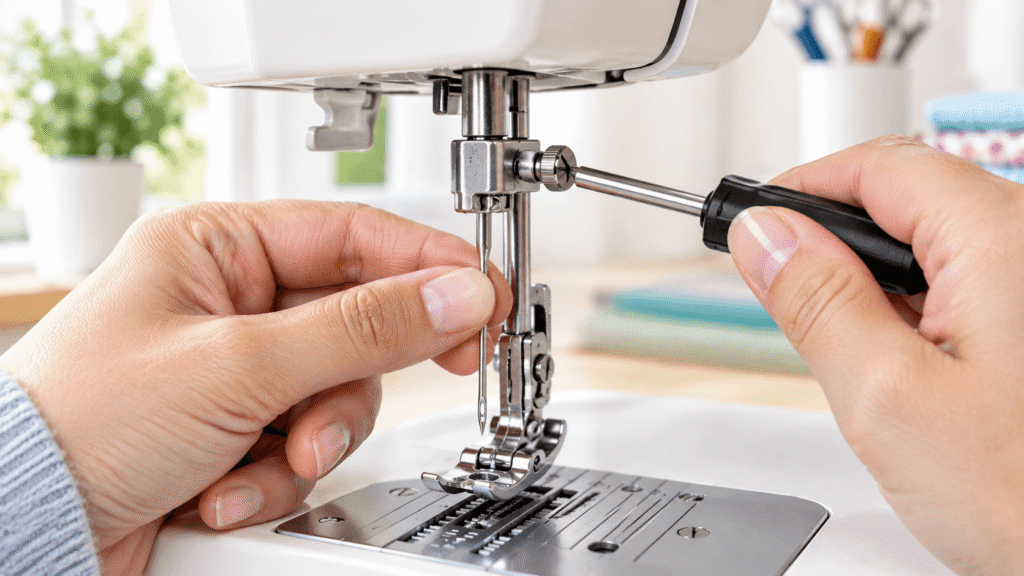
Step 4 — Tighten the Clamp Screw
Hold the needle in place with one hand while you tighten the clamp screw with the other, turning it until snug. It doesn’t need to be forced — overtightening can make the screw harder to loosen at your next needle change.
Step 5 — Test with the Hand Wheel Before Sewing
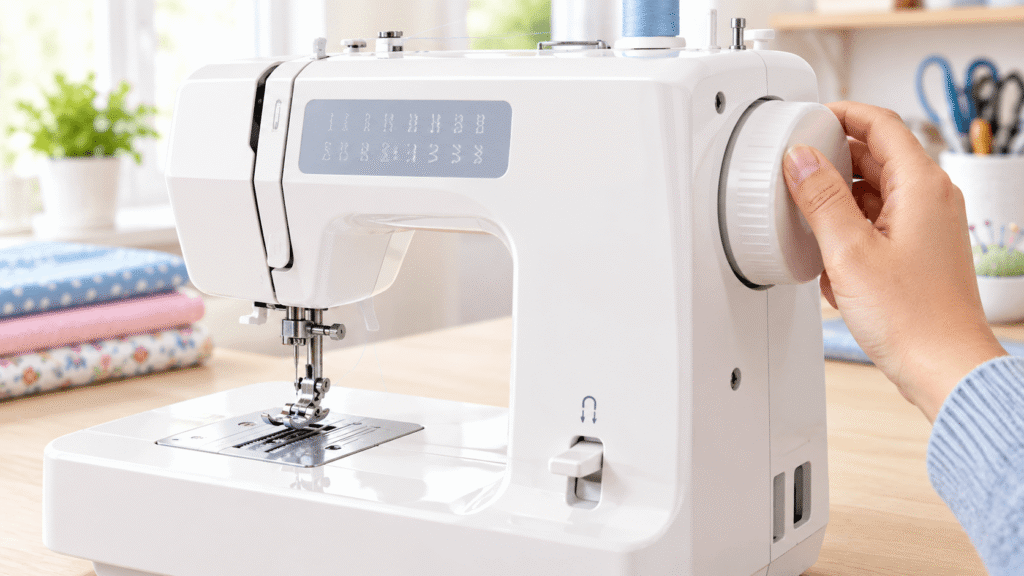
Before plugging the machine back in, turn the hand wheel by hand through one full rotation. The needle should move up and down smoothly without striking the needle plate or the presser foot. Catching a misaligned needle this way is far better than discovering it mid-seam.
The Exception: Side-Loading Bobbin Machines
Most of the advice above assumes a standard flat-side-back orientation, and that holds true for the vast majority of domestic machines. But a small number of machines, mostly older models with a side-loading bobbin design, require the flat side to face a different direction — sometimes to the right rather than the back.
If you’ve followed every step above correctly and your machine still skips stitches, check your specific model’s manual before assuming you’ve made a mistake. The flat-side-back rule is the standard, not a universal law.
Industrial vs. Domestic Needle Insertion
Domestic machines use a standardized flat-shank needle system that only fits one way, which is precisely why the flat side matters so much on a home machine. Industrial machines often use round-shank needles instead, which can physically rotate in the clamp, so the needle has to be manually aligned so its scarf faces the same side as the machine’s hook assembly rather than relying on a flat edge to set the position automatically.
Troubleshooting: Needle Won’t Sit Right
Needle Doesn’t Push All the Way Up
This usually means the needle bar wasn’t raised to its highest position before you started, or the needle is slightly bent and binding against the inside of the clamp. Lower the bar fully with the hand wheel and try again with a known-straight needle.
Clamp Screw Won’t Tighten Securely
A screw that won’t catch is often a sign the needle isn’t pushed up far enough to seat against the stopper pin. Loosen the screw fully, reseat the needle all the way up, and try tightening again.
Machine Makes Noise or Vibrates After Insertion
A metallic tapping or unusual vibration right after a needle change almost always points to the needle striking the needle plate, which means it’s sitting too low, too far forward, or at a slight angle. Stop immediately, turn the hand wheel by hand to confirm the issue, and reseat the needle before sewing further.
Needle Slowly Works Its Way Down While Sewing
If a needle gradually loosens and drops lower during a project, the clamp screw likely wasn’t tightened enough the last time it was changed, and the vibration from sewing is working it loose. Retighten firmly, checking again after a few minutes of sewing.
What Happens If You Insert It Wrong?
A backward or poorly seated needle mostly causes skipped stitches and frustration, but repeatedly forcing a misaligned needle to sew, or ignoring a needle that’s striking the plate, can eventually damage the needle bar itself — a repair that’s considerably more expensive and time-consuming than taking an extra thirty seconds to check orientation before you start.
Common Mistakes to Avoid
- Inserting the needle before raising the needle bar to its highest position
- Assuming every machine uses the exact same flat-side-back orientation without checking an unfamiliar model
- Not pushing the needle all the way up to the stopper pin before tightening
- Skipping the hand-wheel test before plugging the machine back in
- Ignoring a tapping sound or vibration instead of stopping to reseat the needle
FAQs
How do I know which way to insert my sewing machine needle?
Look at the needle’s shank for a flat side and a rounded side. On nearly every domestic machine, the flat side faces the back of the machine once inserted, though a small number of side-loading bobbin machines are an exception worth checking your manual for.
What happens if I insert a sewing machine needle backward?
The needle’s scarf ends up facing away from the machine’s hook instead of toward it, so the hook can’t catch the thread loop properly. This typically causes skipped stitches rather than the machine refusing to sew entirely.
Why won’t my needle push all the way into the clamp?
This is usually because the needle bar wasn’t raised to its highest position first, or the needle itself is slightly bent. Lower the bar fully and double-check the needle is straight before trying again.
Why is my machine vibrating after I inserted a new needle?
A metallic tap or vibration right after a needle change usually means the needle is striking the needle plate because it’s sitting too low or at a slight angle. Stop and reseat the needle before continuing.
Do all sewing machine needles have a flat side?
All standard domestic sewing machine needles do, which is part of what makes them fit only one correct way. Industrial machines sometimes use round-shank needles instead, which require manually aligning the scarf with the hook assembly.
Conclusion
Once you understand why the flat side matters not as an arbitrary rule, but because it lines the needle’s scarf up with the machine’s hook the whole process of how to insert a sewing machine needle makes a lot more sense. The hand-wheel test at the end takes a few seconds and catches most insertion problems before they turn into a frustrating, skipped-stitch seam.
If you’re not sure your needle needed replacing in the first place, our guide on how to change a sewing machine needle covers the full process, including the signs it’s time for a fresh one.