

How to machine quilt a quilt comes down to three choices: which method you’ll use, what order you’ll stitch in, and how you’ll manage the bulk. Get those right and the stitching itself is the easy part.
This guide covers the quilting stage in depth. If you want the full start-to-finish roadmap first, read our pillar guide on how to quilt with a sewing machine. Here, we assume your quilt sandwich is already basted and ready to go.
Table of Contents
Quick Answer
To machine quilt a quilt, attach a walking foot, set a stitch length around 3.0 to 3.5 mm, and keep the feed dogs up. Stitch in the ditch along the main seams first to stabilize the layers. Then add straight lines, working from a line through the center outward, and stitching each line from one edge to the other.
For free-motion quilting, switch to a darning foot, lower the feed dogs, and move the quilt yourself at a steady pace.
Before You Start Quilting
Spend five minutes on setup. It prevents most of the trouble that shows up halfway across a quilt.
- The sandwich is basted. The top, batting, and backing should be smooth and held together with pins or spray. Our pillar guide on how to quilt with a sewing machine covers basting in Stage 3.
- The right foot is on. Use a walking foot for straight lines and stitch in the ditch. Use a darning or free-motion foot for freehand designs.
- A fresh needle is in. A 90/14 quilting needle suits three layers. See what size sewing machine needle to use for the reasoning.
- Tension is tested. Sew a few inches on a scrap sandwich and check both sides. If the stitches look off, follow our guide on how to adjust sewing machine tension.
- The bobbin is full. Running out mid-line leaves a visible join.
Choose Your Quilting Method
According to Wikipedia, straight-line machine quilting is normally done by replacing the regular presser foot with an even-feed walking foot. Free-motion quilting is a different technique, where you move the quilt yourself under the needle.
| Method | Foot | Feed Dogs | Skill Level | Best For |
|---|---|---|---|---|
| Stitch in the ditch | Walking foot | Up | Beginner | Following seams, subtle texture |
| Parallel or diagonal lines | Walking foot | Up | Beginner | Clean geometric look, crosshatch |
| Free-motion quilting | Darning or free-motion foot | Lowered or covered | Needs practice | Curves, swirls, meandering fills |
Most beginners start with stitch in the ditch and straight lines. Both are forgiving, and the walking foot does the feeding for you.
Plan Your Quilting Order
Knowing how to machine quilt a quilt in the right order is what prevents puckers. This is the part most guides skip. The order you stitch in decides where the extra fabric goes.
Here’s a simple order that works on most quilts:
- Stabilize with the ditch first. Stitch along the main seam lines before adding anything else. Graceframe notes that quilting the ditch first stabilizes the layers before you add decorative designs.
- Start with a line through the center. Quilt it from one edge of the quilt to the opposite edge, then work outward one line at a time.
- Stitch every line edge to edge. Don’t start a line in the middle and sew outward. Sewing from one side to the other keeps the layers from shifting.
- Rotate and repeat. Finish the lines in one direction, turn the quilt 90 degrees, and quilt the other direction.
- Add designs and borders last. Many quilters finish the main body first, then quilt the borders.
Picture a lap quilt with three columns of blocks. You’d ditch-stitch the seam between the center columns first, then each seam moving outward, then rotate and ditch the horizontal seams. By the time you reach the borders, the layers are already locked together.
How to Machine Quilt a Quilt with Straight Lines
Straight-line quilting is the easiest way to learn how to machine quilt a quilt. The walking foot feeds the layers evenly, so your job is mostly steering.
Set the stitch length to about 3.0 to 3.5 mm. That’s a common starting point for three layers, and some quilters go slightly shorter when the stitching is dense.
Stitch in the Ditch

The “ditch” is the low side of a seam, right where two pieces meet. Stitching there hides the thread and gives the quilt a flat, subtle texture.
- Roll both sides of the quilt tightly so it fits through the machine’s throat.
- Line the edge of the walking foot up against the seam line.
- Stitch slowly along the seam, letting the feed dogs move the quilt.
- Remove pins just before the needle reaches them.
If you want the stitching to disappear, try monofilament thread. It’s less likely to show against the seam.
Parallel and Diagonal (Crosshatch) Lines
For straight lines across the quilt, use the edge of the walking foot or an adjustable guide bar to space each row evenly. Mark diagonal lines with a removable marker or quilting tape before you sew.
Start the first line through the center. Begin stitching just off the edge of the quilt, on the batting if you can, and sew all the way across so each line runs completely edge to edge.
For a crosshatch, quilt all the lines in one direction first. Then rotate the quilt and stitch the crossing lines.
How to Machine Quilt a Quilt with Free-Motion Quilting

Free-motion quilting lets you draw with thread. It takes more practice, but it opens up curves and freehand patterns that a walking foot can’t make.
Set Up the Machine
Attach a darning foot, also called a free-motion or hopping foot. Lower the feed dogs, or cover them if your machine has a cover plate, so the quilt can move in any direction.
According to Wikipedia, the length of each stitch comes from how far you move the quilt between needle strokes. If your machine has stitch regulation, it helps keep stitches even.
If you can, use an extension table so the quilt sits flat around the needle.
Start with a Simple Meander
Most quilters begin with a meander, a wandering line that doesn’t cross itself. Work one small section at a time, and keep the rest of the quilt rolled up out of the way.
Choose designs that fit comfortably within your machine’s throat space. A motif bigger than the area you can reach is hard to control.
Keep Your Hands and the Machine in Sync
Stitch quality depends on rhythm. If your hands move faster than the needle, stitches get long. If they move slower, stitches bunch up and you may see puckers.
Find a steady pace and stay with it. When you need to stop and reposition, leave the needle down in the fabric so the quilt holds its place.
How to Start and Stop Your Stitching
Locking your stitches keeps lines from coming undone after washing. A few tiny stitches, or a short backstitch, at the start and end of each line does the job.
Trim the thread tails once the line is done. If you started and ended off the quilt top, the tails sit on the batting edge and disappear into the binding.
When you need to pause, stop with the needle down. Lift the foot, adjust the quilt, lower the foot, and carry on.
Managing the Bulk of the Quilt
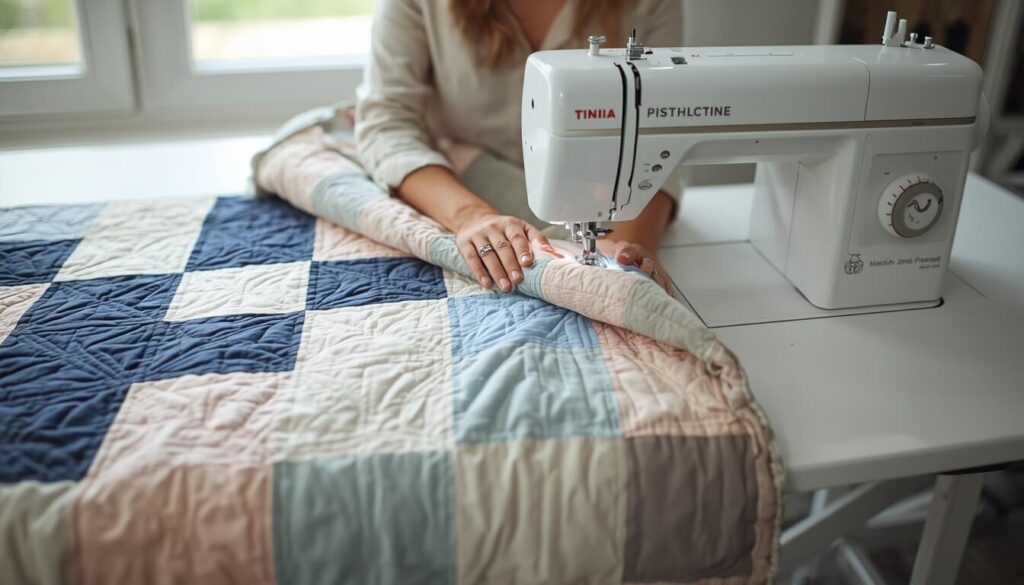
Bulk is the main reason learning how to machine quilt a quilt feels hard. These habits help.
- Roll the quilt. Roll the sides toward the center so only the section you’re stitching sits under the arm.
- Support the weight. Let the quilt rest on the table or an extension table so it doesn’t pull on your stitches.
- Clear the path. Keep the quilt from hanging over the edge of the table, since that drag distorts your lines.
- Take breaks. Tense shoulders lead to jerky stitches.
- Consider gloves. Some quilters wear gripping gloves to move the quilt more smoothly during free-motion work.
For very large quilts, work in sections and don’t rush the rolled-up parts.
Fixing Common Machine Quilting Problems
When you’re learning how to machine quilt a quilt, most problems come from the same few causes. Use this table to find yours.
| Problem | Likely Cause | Quick Fix |
|---|---|---|
| Puckers or tucks on the back | Layers shifting, short stitch, or mismatched hand and machine speed | Walking foot, longer stitch, re-baste, steady speed |
| Wavy or wandering lines | Pushing the quilt instead of letting the feed dogs work | Follow the foot edge or a marked line, relax your hands |
| Skipped stitches | Dull needle or thick seam intersections | Fresh 90/14 needle. See why your machine is skipping stitches |
| Thread shreds or snaps | Needle too small for the thread, or tension off | See why your thread keeps breaking |
| Needle breaks at seams | Hitting thick seams or a pin at speed | Slow down, remove pins. See why needles keep breaking |
| Loops on the back | Top tension or threading | See how to fix sewing machine tension |
Batting sheds a lot of lint, so clean the bobbin area when you finish. Here’s how to clean a sewing machine.
Helpful Tips for Smoother Quilting
A few habits make how to machine quilt a quilt feel much more manageable.
- Make a practice sandwich from leftover fabric and batting, and test every setting on it first.
- Match your bobbin thread to the top thread or to the backing, so any stray loops blend in.
- Work in short sessions, because stitching quality drops when you’re tired.
- Check the back of the quilt every few lines instead of waiting until the end.
- Quilt a small project, like a table runner, before you attempt a bed-size quilt.
- Change the needle at the start of each quilt, since layered batting dulls it quickly.
Common Mistakes to Avoid
- Starting a line in the middle of the quilt instead of running it edge to edge
- Skipping the ditch stitching and going straight to decorative lines
- Quilting without a walking foot on straight lines
- Free-motion quilting with the feed dogs still up
- Leaving pins in the path and hitting them at speed
- Letting the quilt hang off the table
- Skipping a practice sandwich before the real quilt
- Rushing, which causes puckers and wobbly lines
FAQs
How do I machine quilt a quilt for beginners?
Start with a walking foot and stitch in the ditch along the main seams, then add straight lines. Use a stitch length around 3.0 to 3.5 mm and quilt from a center line outward, each line edge to edge. Practice on a scrap sandwich first.
Should I use a walking foot or a free-motion foot?
Use a walking foot for straight lines and stitch in the ditch, since it feeds all layers evenly. Use a free-motion foot for freehand curves and fills. Beginners usually start with the walking foot because it’s more forgiving and builds confidence.
What order should I quilt a quilt in?
Stitch the main ditches first to stabilize the layers, then quilt lines starting from the center and working outward, each one edge to edge. Rotate and repeat in the other direction. Add designs and borders last so the body is already secure.
Should I remove pins before machine quilting?
Yes, remove pins as you reach them, ideally just before the needle gets there. Stitching over a pin can break a needle or damage the machine. Keep pins in place elsewhere until needed, so the layers stay secure while you work.
How do I stop puckers on the back of my quilt?
Use a walking foot, lengthen the stitch, and baste more closely. Quilt from the center outward, with each line edge to edge. In free-motion work, puckers often mean your hand speed and the needle speed aren’t matched, so slow down and find a rhythm.
Why are my quilting lines wavy?
Wavy lines usually come from pushing or pulling the quilt. Let the feed dogs and walking foot do the moving. Use the edge of the foot, an adjustable guide bar, or a marked line as a guide, and keep your hands relaxed.
How do I start and stop machine quilting stitches?
Use a few tiny stitches or a short backstitch at the start and end of each line to lock the thread. Trim the tails afterward. Starting and ending just off the quilt top keeps the tails out of sight and under the binding.
Can I free-motion quilt on a regular sewing machine?
Yes, most home machines can if you can lower or cover the feed dogs and attach a darning foot. Use an extension table if you have one, work in small sections, and start with a simple meander before trying detailed designs.
Conclusion
Once you understand how to machine quilt a quilt as a method, an order, and a way to handle bulk, the process stops feeling overwhelming. Ditch first, work outward from a center line, stitch every line edge to edge, and test your settings on a scrap sandwich.
When the quilting is done, the last step is binding the edges. For the complete roadmap from planning to binding, see our pillar guide on how to quilt with a sewing machine. And if you’re planning your next quilt, use the Fabric Yardage Calculator to work out how much fabric you need.
Related articles