
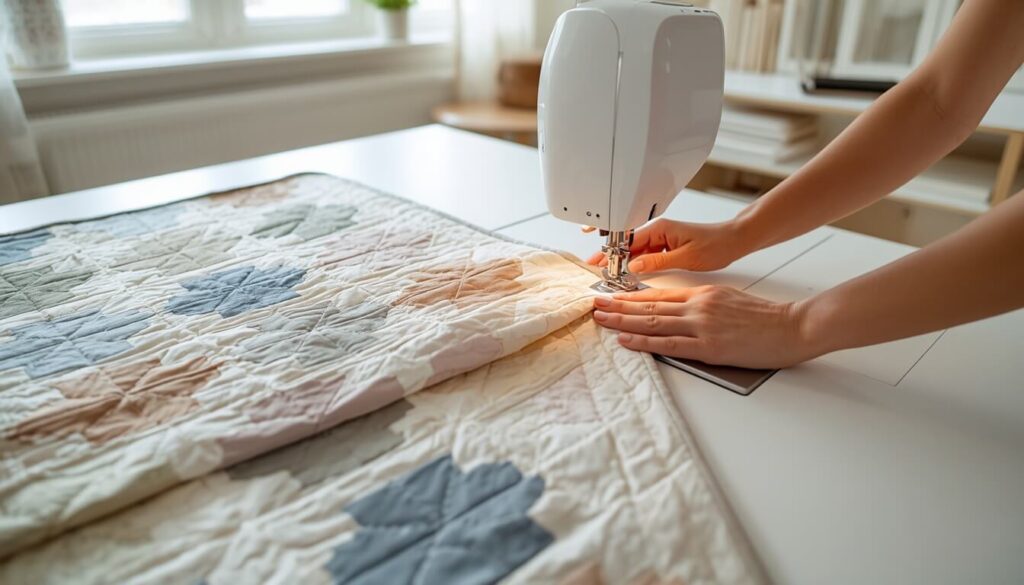
How to bind a quilt with a sewing machine is easier than most beginners expect, once you know one trick: sew the binding to the back of the quilt first, then fold it to the front and stitch it down by machine. There’s no hand sewing, and you can see your corners as you stitch them.
This guide walks through every step, from cutting the strips to closing the ends, and shows you how to fix the problems that trip people up. For the full process that leads up to this point, see our pillar guide on how to quilt with a sewing machine.
Table of Contents
Quick Answer
Here’s how to bind a quilt with a sewing machine in short. Cut strips about 2.5 inches wide, join them into one long strip with diagonal seams, and press it in half lengthwise. Sew the binding to the back of the quilt with a quarter-inch seam, mitering each corner as you go. Join the ends, fold the binding to the front, clip it in place, and stitch it down close to the folded edge.
What You Need Before You Bind
Gather these before you start, so you don’t stop mid-edge to look for something. They’re all the tools you need for how to bind a quilt with a sewing machine.
- A quilt that’s been quilted, trimmed, and squared up
- Binding fabric, about 2.5 inches wide per strip
- Rotary cutter, mat, and clear ruler
- Walking foot, if you have one
- Wonder clips or pins
- Thread that matches your binding
- An iron and ironing board
Check that the quilt edges are straight and the corners are square before you cut a single strip. Our fabric measurement guide shows how to square and measure accurately.
A walking foot isn’t strictly required, but it helps. It feeds the quilt and binding evenly, so the layers don’t creep apart as you sew.
Step 1: Cut and Prepare the Binding Strips

How Many Strips You Need
Measure around all four sides of the quilt and add them together. Add about 10 inches for the corners and the join, then divide by the usable width of your fabric.
Quilting cotton is typically 42 to 44 inches wide, but the selvedges come off, so plan on about 40 inches of usable length per strip. Our fabric width guide explains why. Always round up to a whole strip.
Here’s a worked example. A 50 by 65 inch throw has a perimeter of 230 inches. Add 10 inches for 240, divide by 40, and you need 6 strips.
For how much fabric those strips take, see our guide on how much fabric for a quilt, and use the Fabric Yardage Calculator to buy the right amount.
Join the Strips With Diagonal Seams
Place two strips right sides together at a right angle, with their ends overlapping in a corner. Draw a line from one inner corner to the other, and sew along it.
Trim the excess to a quarter inch, then press the seam open. A diagonal seam spreads the bulk, so you won’t get a thick lump where the strips join. Repeat until all the strips make one continuous length.
Join the Strips With Diagonal Seams
Place two strips right sides together at a right angle, with their ends overlapping in a corner. Draw a line from one inner corner to the other, and sew along it.
Trim the excess to a quarter inch, then press the seam open. Janome’s machine binding tutorial uses the same diagonal join, because it spreads the bulk, so you won’t get a thick lump where the strips join. Repeat until all the strips make one continuous length.
How to Bind a Quilt with a Sewing Machine: Step by Step
Now for the sewing part of how to bind a quilt with a sewing machine. Use a quarter-inch seam allowance for every step below.
Step 2: Attach the Binding to the Back
Lay the quilt with the back facing up. Place the binding along the edge, with the raw edges of the binding lined up with the raw edge of the quilt.
Start in the middle of one side, not near a corner. Leave a tail of about 8 to 10 inches unsewn at the beginning. You’ll need it to join the ends later.
Sew with a walking foot and a stitch length that matches your quilting stitches. Bryan House Quilts recommends matching the two, which keeps the binding from looking out of step with the quilting.
Step 3: Miter the Corners
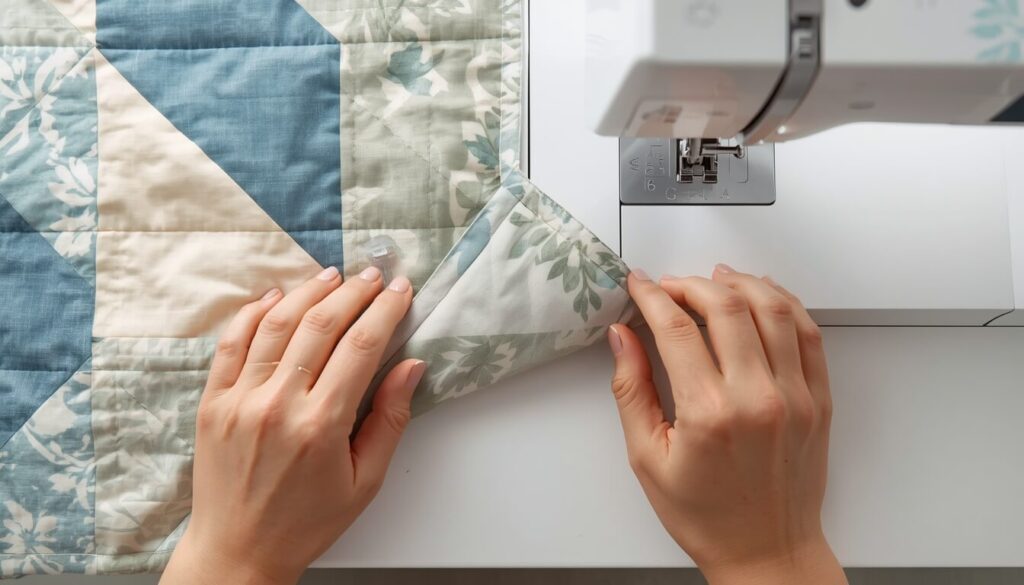
The miter is the neat diagonal fold at each corner. It’s the part of how to bind a quilt with a sewing machine that beginners worry about most, but it’s the same four moves every time.
- Stop sewing a quarter inch before the corner, and backstitch.
- Remove the quilt from the machine, and rotate it so the next edge faces you.
- Fold the binding straight up, away from the quilt. This makes a 45 degree fold.
- Fold the binding straight back down, so its raw edge lines up with the next side of the quilt.
Start sewing again at the top edge of the fold, and stitch down the new side. Repeat at every corner.
Picture a corner where the binding was folded up but not folded back down. The result is a gap in the corner and a binding that pulls away from the edge. Taking the extra moment to fold down fixes it.
Step 4: Join the Binding Ends
Stop sewing about 12 inches before you reach the start, leaving a gap. The two loose tails now need to meet.
Here’s the rule that matters most. According to The Seasoned Homemaker, the binding tails should overlap by the same length as the strip is wide. For 2.5 inch binding, that means a 2.5 inch overlap.
- Lay both tails flat along the quilt edge, and trim them so they overlap by the strip width.
- Open both tails and place them at right angles, right sides together, with the strips flat and untwisted.
- Sew a diagonal seam across the corner, the same way you joined the strips.
- Before you trim, refold the binding and check that it fits the quilt edge.
- Trim the seam to a quarter inch, press it open, and sew the rest of the binding down.
If the binding looks twisted after you refold it, take out the diagonal seam and flip one tail. A twisted strip is the most common mistake here.
Step 5: Fold the Binding to the Front and Clip
Now fold the binding over the edge of the quilt to the front. The mitered corners form on their own as you fold them.
Use wonder clips or pins to hold the binding in place all the way around. Clips are gentler on thick quilts, and they don’t leave holes.
Make sure the folded edge covers the seam line you sewed on the back. A consistent width gives a neat, even border.
Step 6: Stitch the Binding Down From the Front

Stitch close to the folded edge of the binding, about an eighth of an inch in. Work slowly, and remove clips just before the needle reaches them.
Sewing from the front lets you see each corner as you reach it, and it’s the main reason this method gives tidy results. At each corner, stop with the needle down, lift the foot, pivot, and carry on.
Check the back every few inches to make sure the stitching is catching the binding underneath. If it isn’t, re-clip, and slow down.
Many quilters use a straight stitch. If you want a decorative finish, a blanket stitch or a satin stitch also works.
Front-First or Back-First? Choosing Your Binding Method
You’ve now seen the back-first way of how to bind a quilt with a sewing machine. There are other ways to bind a quilt, and each suits a different goal.
| Method | How It Works | Pros | Cons |
|---|---|---|---|
| Back-first, machine stitched from the front | Sew to the back, fold to the front, topstitch | No hand sewing, and you can see the corners | The back stitching needs checking |
| Front-first, hand finished | Sew to the front, fold to the back, stitch by hand | Nearly invisible finish | Slow, and it takes hand sewing time |
| Front-first, stitched in the ditch from the front | Sew to the front, fold to the back, stitch along the seam line | No hand sewing | Less control over what the back catches |
For a fully machine finish, back-first is the one most beginners find easiest.
Fixing Common Binding Problems
When you’re learning how to bind a quilt with a sewing machine, problems usually come from the same few mistakes. Check this table first.
| Problem | Likely Cause | Quick Fix |
|---|---|---|
| Binding twists after joining the ends | One tail was twisted when the strips were joined | Unpick the seam, lay both tails flat, and rejoin |
| Gaps or puckers at corners | Not stopping a quarter inch away, or skipping the fold-down | Stop a quarter inch from the edge, fold up, then fold down |
| Wavy, stretched edge | Pulling the binding or stretching it while pressing | Let the walking foot feed, and don’t tug |
| Back stitching misses the binding | The fold doesn’t cover the seam line, or stitches wander | Re-clip and check the back as you go |
| Lumps at the strip joins | Straight seams instead of diagonal | Use diagonal seams, and press them open |
| Skipped stitches at thick corners | Many layers meeting at once | Slow down and use a fresh needle. See why your machine is skipping stitches |
| Needle breaks at a corner | Hitting a thick fold at full speed | See why needles keep breaking |
Helpful Tips for Neat Machine Binding
These habits make how to bind a quilt with a sewing machine feel much easier.
- Use the same walking foot you used for quilting, so the layers feed evenly.
- Choose a thread that matches the binding, since you’ll sew on the front.
- Clip generously. Extra clips at the corners prevent shifting.
- Sew slowly through the corners, where the layers are thickest.
- Press the binding after you finish. It sets the folds and flattens the edge.
- If your quilt is bulky, support its weight on the table.
If you’re still working on the quilting stage, our guide on how to machine quilt a quilt covers it in detail.
Common Mistakes to Avoid
- Cutting the binding without measuring the quilt perimeter first
- Joining strips with straight seams instead of diagonal ones
- Starting the binding in a corner instead of the middle of a side
- Not leaving long enough tails to join the ends
- Skipping the test fit before trimming the ends
- Stretching the binding while sewing or pressing
- Forgetting to check the back stitching as you sew from the front
FAQs
How do I bind a quilt with a sewing machine?
Cut strips about 2.5 inches wide, join them with diagonal seams, and press in half. Sew the binding to the back with a quarter-inch seam, miter the corners, and join the ends. Then fold it to the front and stitch it down close to the folded edge.
How wide should quilt binding strips be?
Most quilters cut binding strips about 2.5 inches wide. Folded in half, that gives a double-fold binding that finishes to a neat, durable border. Narrower strips make a thinner edge, but 2.5 inches is the common starting point for machine binding.
How many binding strips do I need?
Add up the four sides of the quilt, add about 10 inches for corners and joins, and divide by the usable width of your fabric, often about 40 inches. Round up to a whole strip. A 50 by 65 inch throw needs about 6 strips.
Should I sew binding to the front or back first?
For machine binding, sew it to the back first. Then you fold it to the front and stitch it down from the front, where you can see the corners and keep the stitching neat. Front-first is better if you plan to finish by hand.
Why does my quilt binding twist?
Binding usually twists when one tail was flipped as the ends were joined. Lay both tails flat with the right sides together, and check the strip isn’t twisted before you sew the diagonal seam. Test the fit before trimming, and unpick the seam if it looks twisted.
How do I join the ends of quilt binding?
Stop sewing about 12 inches from the start. Trim the tails so they overlap by the width of the strip, open them, and place them at right angles. Sew a diagonal seam, test the fit, trim, and finish stitching. Check for twists before you sew.
What stitch should I use to sew the binding down?
A straight stitch close to the folded edge, about an eighth of an inch in, is the most common choice. For a decorative finish, a blanket stitch or satin stitch also works well. Use a matching thread and a stitch length close to your quilting stitches.
Do I need a walking foot to bind a quilt?
It’s recommended, since a walking foot feeds the top and bottom layers evenly so the binding doesn’t creep. You can bind without one by going slowly and clipping often, but a walking foot makes the process smoother, especially on thick quilts.
Conclusion
Once you know how to bind a quilt with a sewing machine, the finishing step stops feeling like the hardest part of quilting. Sew the binding to the back, miter each corner with the same four moves, join the ends with a diagonal seam, and stitch it down from the front where you can see your work.
For the full process that leads up to binding, see our pillar guide on how to quilt with a sewing machine. And when you’re planning your next quilt, use the Fabric Yardage Calculator to work out how much fabric you need, including the binding.
Related articles