
If your stitches have ever looked fine on top but messy underneath, the bobbin is usually the reason. Learning how to wind a bobbin properly is one of those small skills that quietly decides whether your sewing machine runs smoothly or fights you the whole way through a project.
It only takes a couple of minutes once you know the order of steps. This guide walks through exactly how to do it, what a properly wound bobbin should look like, and the small mistakes that cause most of the trouble.
Quick Answer
To wind a bobbin: place your thread spool on the spool pin, guide the thread through the machine’s thread guide, wrap it around the bobbin winding tension disc, thread the end through the hole in the bobbin, set the bobbin on the winder pin, and press the foot pedal (or start button) until the bobbin fills evenly. Then trim the thread and pop the bobbin out.
The details vary slightly by brand, but this general order applies to almost every home sewing machine.
What You’ll Need
| Item | Notes |
|---|---|
| Empty bobbin | Must match your machine’s bobbin class (metal or plastic — check your manual) |
| Spool of thread | Any all-purpose thread works for practice |
| Your sewing machine | With the bobbin winder mechanism accessible |
A quick note before you start: sewing machines don’t all use the same bobbin. Some take a Class 15 plastic bobbin, others use a metal one, and using the wrong type is one of the fastest ways to end up with tension problems later. If you’re not sure which one your machine takes, it’s worth checking before you buy a pack of replacements.
Main Explanation: Why Winding Matters More Than People Think
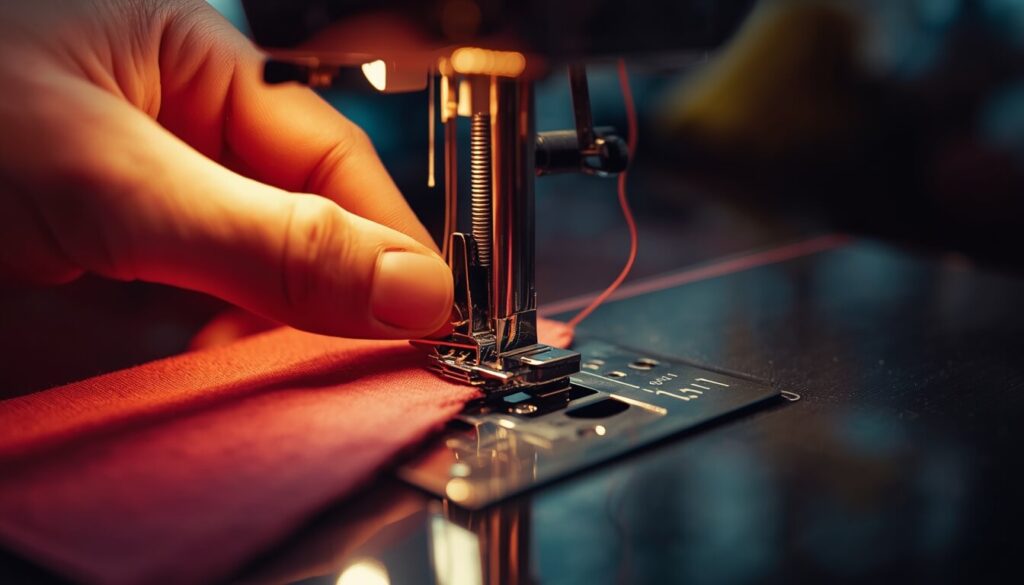
A bobbin is the small spool that carries the lower thread in your stitches. Every stitch your machine makes is really two threads locking together — one from the needle, one from the bobbin. If the bobbin thread is wound loosely, unevenly, or too tight, that lock never happens the way it should.
One mistake many sewists make is treating bobbin winding as a formality — just get thread on there and go. But a poorly wound bobbin behaves unpredictably even if everything else on the machine is set up correctly. It can cause skipped stitches, thread that bunches underneath the fabric, or a bobbin that runs out of thread far sooner than it should because the layers weren’t packed evenly.
The tension disc is doing more work than it looks like. As the thread winds onto the bobbin, that disc is what keeps the thread taut so each layer sits flat against the one before it. Skip that step, or let the thread slip out from between the discs, and the bobbin ends up soft and spongy instead of firm.
Step-by-Step: How to Wind a Bobbin
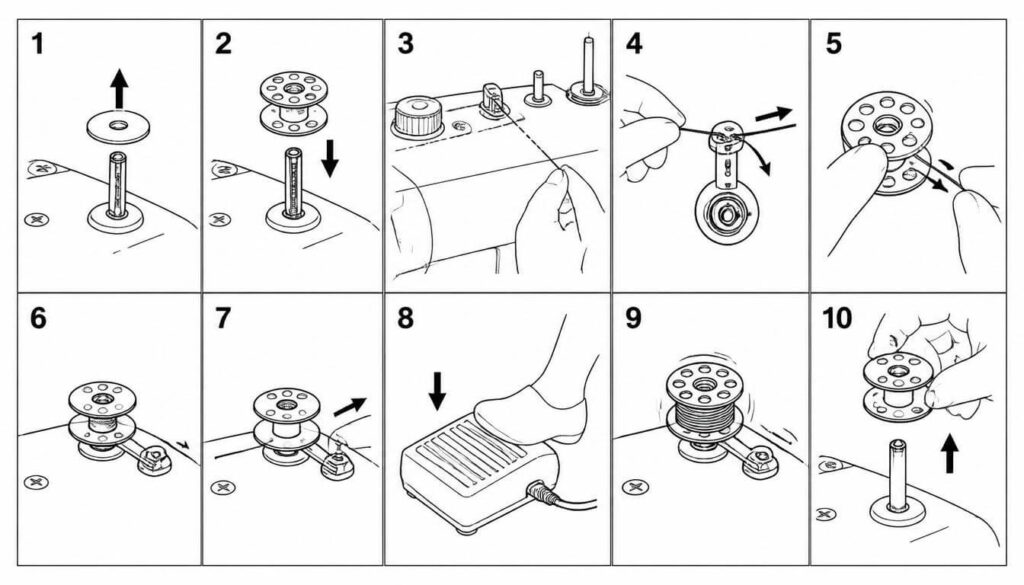
Step 1 — Place the thread spool on the spool pin. Slide the spool onto the pin and, if your machine has one, secure it with a spool cap so it doesn’t wobble while unwinding.
Step 2 — Guide the thread through the thread guide. Follow the small hooks or notches near the spool pin — most machines have a printed diagram right on the top of the machine showing the path.
Step 3 — Wrap the thread around the bobbin winding tension disc. This is the step people skip most often. The thread needs to sit snugly between the disc plates, not just brush past them, or the bobbin will wind loosely. If you’re unsure exactly where your machine’s tension disc sits, your manufacturer’s official threading guide usually has a diagram specific to your model.
Step 4 — Thread the bobbin. Pass the thread end through the small hole in the bobbin, going from the inside out.
Step 5 — Place the bobbin on the winder pin or shaft, then engage it. Push the pin or shaft toward the winding position — usually to the right. On some machines you’ll feel or hear a small click.
Step 6 — Hold the thread tail and start winding. Press the foot pedal gently, or press the start button if your machine has one. Hold the thread tail lightly for the first few turns so it doesn’t pull loose, then let go.
Step 7 — Let the bobbin fill, then stop. Most machines stop automatically or slow down noticeably once the bobbin is full. Don’t force it past that point.
Step 8 — Cut the thread and remove the bobbin. Slide the winder pin back to the sewing position and lift the bobbin off.
How to Tell If a Bobbin Is Wound Correctly
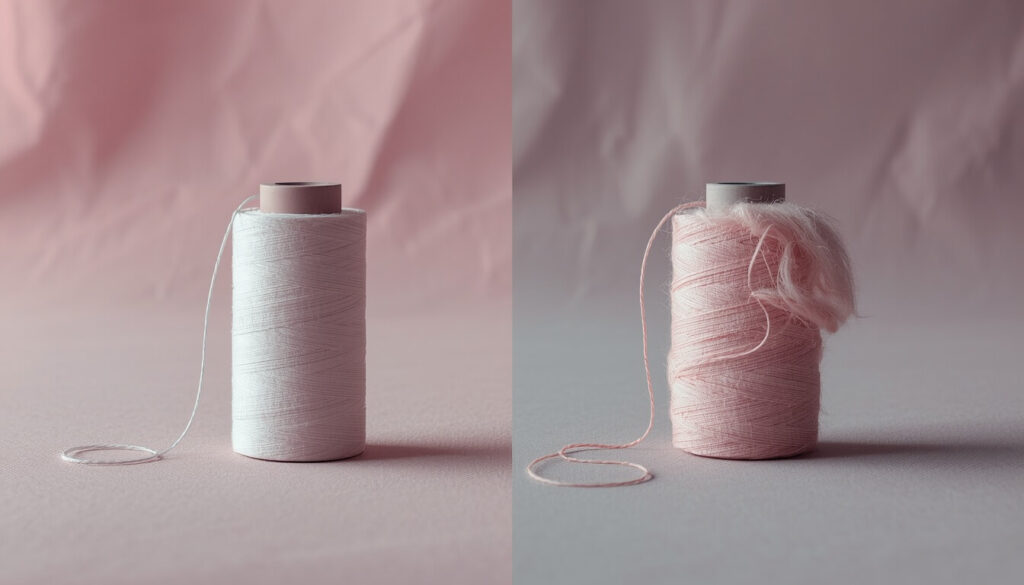
| Well-Wound Bobbin | Poorly Wound Bobbin |
|---|---|
| Thread lies in smooth, even layers | Thread looks lumpy or uneven in spots |
| Feels firm when you press on it | Feels soft, loose, or spongy |
| Doesn’t extend past the bobbin’s rim | Thread bulges over the edge |
| Unwinds smoothly without tangling | Loops or tangles when pulled |
If your bobbin looks like the second column, it’s worth unwinding it and starting again rather than sewing with it. It rarely fixes itself once it’s already loose.
A Real Example
Imagine you’re halfway through hemming a pair of curtains and the machine suddenly starts skipping stitches every few inches, even though it was sewing fine the day before. Before assuming the machine needs a repair, pull out the bobbin and look at it. If the thread looks loose or uneven, that’s very often the entire problem — not the needle, not the tension dial, just a bobbin that wasn’t wound tightly enough. Rewinding it fixes the issue more often than people expect.
Common Mistakes When Winding a Bobbin
- Skipping the tension disc. Letting the thread bypass the disc is the single biggest cause of loose bobbins.
- Using the wrong bobbin type. Metal and plastic bobbins aren’t interchangeable across machines — check your manual first.
- Overfilling the bobbin. Thread packed past the rim can jam the bobbin case or throw off tension.
- Not holding the thread tail at the start. This can let the thread slip loose and tangle around the bobbin before winding really begins.
- Winding too slowly on stretch threads. Elastic or metallic thread needs a slower, more controlled speed than regular cotton thread.
Tips for a Perfect Bobbin Every Time
- Wind bobbins in the direction your machine’s diagram shows — usually clockwise, though this can vary by brand.
- If your thread keeps slipping out of the tension disc, try holding the spool end lightly with your hand as it feeds in.
- Keep a few pre-wound bobbins in the colors you use most, so you’re not stopping mid-project to rewind one.
- If you’re winding elastic or specialty thread, check your machine’s manual — some brands recommend stopping the bobbin at two-thirds full rather than completely full.
FAQs
People searching for how to wind a bobbin usually run into the same handful of questions, so here are the ones worth covering.
Conclusion
Once you’ve practiced how to wind a bobbin a few times, it becomes second nature — but getting it right from the start saves a lot of frustration later. A properly wound bobbin, seated correctly in the tension disc and filled evenly, is one of the simplest ways to keep your stitches consistent from the very first row to the last.
Winding a bobbin is just one small piece of getting comfortable with your sewing machine. We’ve got plenty of other sewing guides on the site covering everything from threading to troubleshooting — feel free to check them out and keep building on what you’ve learned here.
Related Articles
- How to Insert a Bobbin
- How to Thread a Sewing Machine
- What Is a Bobbin on a Sewing Machine
- How to Replace a Bobbin