

How to fix sewing machine tension starts with a rule that surprises most people: don’t touch the dial yet. A large share of tension problems come from threading, lint, thread quality, or sewing speed, and turning the dial only hides the real cause.
This guide starts with your stitches and works backward to the cause. You’ll get a symptom table, a six-step fix order, and a clear list of problems that only look like tension.
Table of Contents
Quick Answer
Here’s how to fix sewing machine tension in short. Rethread the top thread with the presser foot raised, then clean the tension discs and the bobbin area. Put in a new needle, use good thread, and slow down.
If the stitches still look wrong, adjust the top dial by one number and retest. Our pillar guide on how to adjust sewing machine tension covers that last step in detail.
Read the Symptom First

Knowing how to fix sewing machine tension begins with reading what the stitch is telling you. Look at the front and back of a test seam, then match what you see to this table.
| Symptom | Likely Cause | First Fix |
|---|---|---|
| Loops on the bottom of the fabric | Top thread isn’t seated in the tension discs or take-up lever, or top tension is low | Rethread with the presser foot up |
| Bobbin thread showing on top | Top tension too tight, or the bobbin is seated or threaded wrong | Reseat the bobbin, rethread, then lower the dial |
| Puckered seam | Thread or needle too heavy for the fabric, stitches too long, or tension too tight | Fine needle, finer thread, shorter stitch |
| Heavy looping (“eyelashes”) | Thread not seated in the take-up lever, or sewing too fast | Rethread and slow down |
| Fine for a few stitches, then loops appear | Thread slipped out of the take-up lever, or lint in the discs | Rethread and floss the discs |
| Tension looks different on every seam | Uneven thread, lint, or a worn needle | New thread, clean, new needle |
Here’s a real example. You sew a seam that looks perfect for two inches, and then loops appear on the back. That pattern points to the take-up lever, not the dial, because the thread slipped out of it as the machine ran.
How to Fix Sewing Machine Tension: The Fix Order
Work through these in order. Each fix is quick, and the first four solve most problems without a single dial turn.
Fix 1: Rethread Correctly (Foot Up, Take-Up Lever)
Raise the presser foot, pull the thread out completely, and start again from the spool. With the foot down, the tension discs stay closed and the thread can’t seat between them.
Pay special attention to the take-up lever, the metal arm that moves up and down above the needle. If the thread skips it, you’ll get loops that start a few stitches in. Follow our guide on how to thread a sewing machine needle if you want to check every guide on the path.
Leave a tail of three to four inches hanging from the needle before you start sewing.
Fix 2: Floss and Clean the Tension Discs
Lint and thread fuzz collect between the tension discs, and they act like a brake on the thread. A tiny amount of buildup changes how the thread pulls, even when the dial is set correctly.
With the machine unplugged and the presser foot raised, slide a strip of lightweight cotton fabric or a plain thread between the discs. Pull it back and forth a few times, like flossing your teeth. Then rethread and test.
Your manual may show a safer method for your model, especially on machines with enclosed tension units.
Fix 3: Clean the Bobbin Area and Reseat the Bobbin
Remove the bobbin and its case, then brush out lint and thread scraps with a small brush. Lint around the bobbin case changes how the bobbin thread pulls, and that shifts the balance of the stitch.
Check that the bobbin is the correct type, sits flat, and unwinds in the direction your manual shows. If the bobbin is wound unevenly, rewind it.
Fix 4: Check the Needle and Thread
Replace the needle. A dull or bent needle can look just like a tension problem. For the steps, see how to change a sewing machine needle.
Then check the thread. Cheap thread with uneven thickness or a waxy coating can drag unevenly through the discs, which produces loops that come and go even when the dial is right.
Match needle and thread to your fabric too. If you’re not sure, our guide on what size sewing machine needle to use shows the right pairing.
Fix 5: Slow Down and Let the Machine Feed the Fabric
Many sewists overlook speed. According to Superior Threads, eyelashes can form when you stitch too fast or move the fabric faster than the machine can build each stitch.
Slow down, especially on curves, and let the feed dogs move the fabric instead of pushing or pulling it. If you’re free-motion quilting, match your hand speed to the machine speed.
Fix 6: Only Then, Touch the Dial
If the stitches are still off after the first five fixes, the dial is the right tool. Move it one number at a time, using the symptom table above to pick the direction.
The full routine, including the two-color test seam and bobbin adjustments, is in our pillar guide on how to adjust sewing machine tension. Don’t repeat it from memory. Follow the steps in order.
How to Fix Puckering Seams
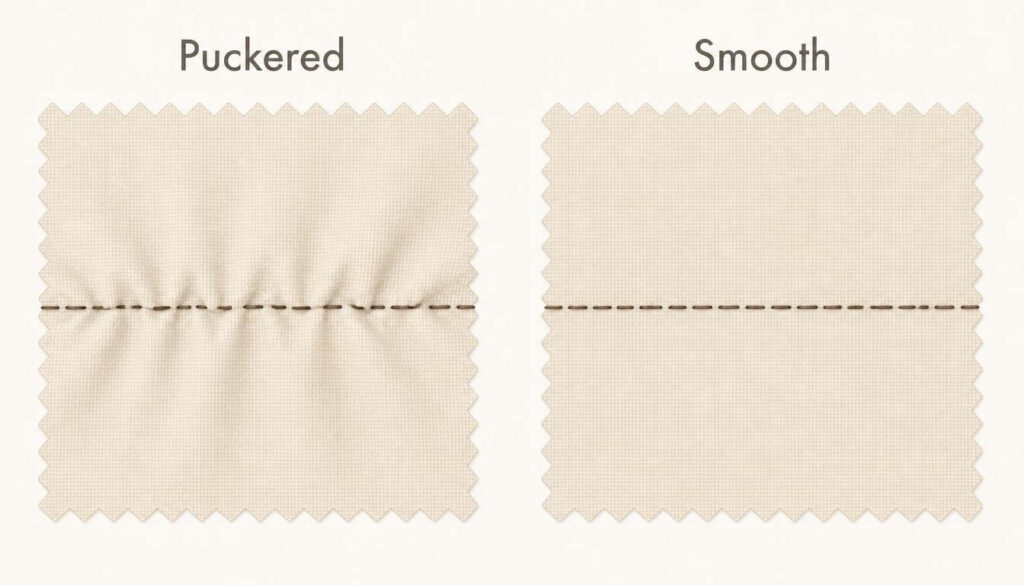
Here’s how to fix sewing machine tension when a seam puckers. Puckering is tension’s most common side effect on thin fabric. The thread pulls tighter than the fabric can handle, so the seam gathers.
Try these changes in order:
- Switch to a finer needle, such as a 70/10, and a finer thread.
- Shorten the stitch length. A shorter stitch, around 2.0 to 2.5 mm, puckers thin fabric less than a 3.0 mm stitch.
- Lower the top tension by one number and retest.
- Check your manual for presser foot pressure, since too much pressure can also pucker fabric.
Picture a silk blouse that puckers along every seam. The fix is rarely a tension number. It’s usually a finer needle and a shorter stitch.
For settings by fabric and thread type, see our guide on ideal sewing machine tension settings.
Quick Troubleshooting Checklist
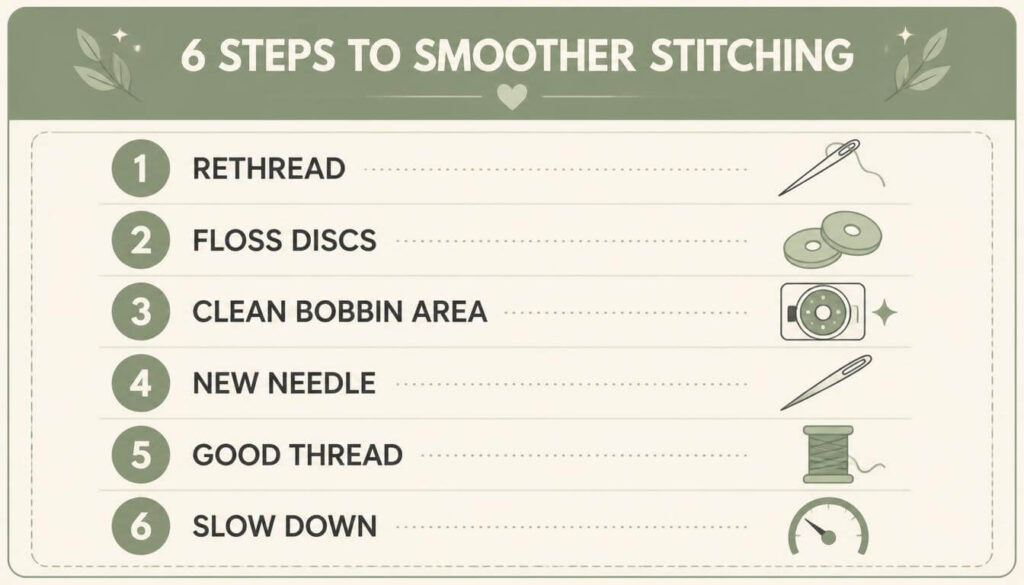
Keep this short version near your machine. It’s how to fix sewing machine tension in about two minutes, in the order that works.
- Raise the presser foot, rethread, and check the take-up lever
- Floss the tension discs
- Remove the bobbin, clean the area, and reseat it
- Put in a new needle
- Switch to a smooth, good-quality thread
- Slow down and let the feed dogs move the fabric
- Adjust the dial one number and test on a scrap
When It Looks Like Tension but Isn’t
Part of knowing how to fix sewing machine tension is knowing when it isn’t tension at all. Before you keep adjusting, check whether yours is one of these.
- Thread snapping: If the thread breaks instead of just looping, see why your sewing machine thread keeps breaking.
- Skipped stitches: If stitches are missing, read why your sewing machine is skipping stitches.
- A tangled clump under the fabric: That’s a different fault, covered in why your sewing machine is looping thread underneath.
- The machine locks up: See why your sewing machine is jamming.
- Clunking or grinding sounds: That points to a mechanical or timing issue, not tension. Our guide on why your sewing machine is making noise helps you sort it out.
When to Call a Professional
Knowing how to fix sewing machine tension also means knowing when to stop. Book a service if the dial is turned all the way up and loops continue. That usually means a worn or stuck tension part.
Call a technician too if the machine makes grinding or clunking sounds, the tension changes by itself between seams, or the problem remains after you’ve rethreaded, cleaned, changed the needle, and used fresh thread. A service visit is cheaper than a repair caused by forcing a stuck part.
Common Mistakes to Avoid
- Turning the dial first, before rethreading or cleaning
- Threading with the presser foot down
- Ignoring the take-up lever when the loops start after a few stitches
- Blaming the dial when the thread is cheap or uneven
- Sewing fast around curves and then wondering why loops appear
- Changing several things at once, so you can’t tell which one fixed it
- Leaving the dial on an odd setting after the project is done
FAQs
How do I fix loose tension on a sewing machine?
Loose top tension shows up as loops on the underside. First rethread with the presser foot up and make sure the thread sits in the take-up lever. Clean the tension discs, then raise the dial by one number and test on a scrap.
How do I fix tight tension on a sewing machine?
Tight tension shows as bobbin thread on top or a puckered seam. Check the bobbin is seated and threaded correctly, use a finer needle on thin fabric, and shorten the stitch. If it persists, lower the top dial by one number.
Why are there loops on top of my fabric?
Loops or bobbin thread on top usually mean the top tension is too tight, or the bobbin is seated or threaded wrong. Reseat the bobbin, rethread the top thread, and then lower the dial one number if the stitch is still off.
What are eyelashes and how do I fix them?
Eyelashes are heavy loops of thread on the back or top of the fabric. They often come from thread missing the take-up lever or sewing too fast. Rethread, slow down, put in a new needle, and clean the discs before changing tension.
Can cheap thread cause tension problems?
Yes. Thread with uneven thickness or a waxy coating can drag unevenly through the discs and create loops that come and go, even with the dial set correctly. Switch to a smooth, good-quality thread and retest before you move any settings.
Why is my tension dial at the highest setting and I still get loops?
If loops continue with correct threading, a fresh needle, and clean discs, a worn or stuck tension part may be the cause. Stop forcing the dial and have a technician inspect the tension mechanism, since cranking it further can strain the thread and the parts.
How do I clean and floss the tension discs?
Unplug the machine and raise the presser foot to open the discs. Slide a thin strip of lightweight cotton fabric or a plain thread between them and pull it gently back and forth. Rethread and test. Check your manual first for your model.
Can I learn how to fix sewing machine tension myself?
Yes. Most tension problems are fixed at home with rethreading, cleaning, and a new needle. Work through the fix order, test on a scrap after each change, keep notes on what worked, and only call a technician if the stitches don’t improve.
Conclusion
Once you know how to fix sewing machine tension in the right order, the dial stops being the first thing you reach for. Rethread, clean, check the needle and thread, slow down, and only then turn the dial.
When you do reach the dial, our pillar guide on how to adjust sewing machine tension gives you the exact routine. And if the problem was something else all along, the related guides below cover the next likely cause.
Related articles