
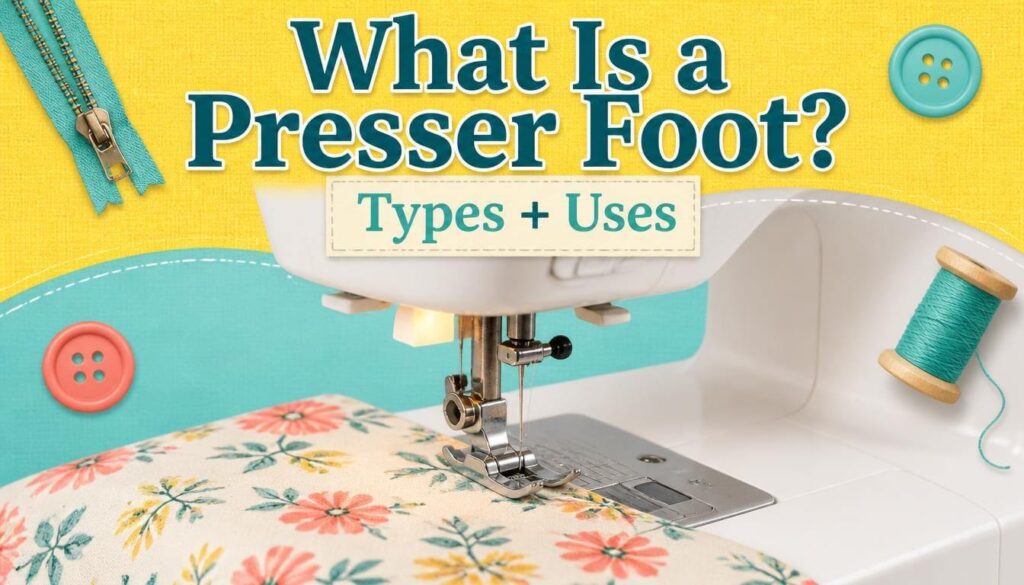
What is a presser foot? It is the small metal or plastic piece that sits just behind your needle and holds fabric flat while you sew. Without it, the cloth would bounce up and down with the needle, and your stitches would come out uneven or not form at all.
Most machines ship with one all-purpose foot. Yet plenty of sewing frustrations, from wobbly zippers to puckered hems, disappear once you switch to the right one. This guide explains what the foot does, the main types, how it attaches, and how to choose one. The presser foot is one of the key parts of a sewing machine, and a little knowledge goes a long way.
Table of Contents
Quick Answer: What Is a Presser Foot Used For?
A presser foot presses fabric against the feed dogs so the cloth moves smoothly and evenly under the needle. Different feet are shaped for different jobs, such as zippers, buttonholes, hems, patchwork or thick layers. The standard foot handles everyday straight and zigzag seams.
What Does a Presser Foot Do?
The foot has three jobs. It holds the fabric steady, it gives the feed dogs something to grip against, and it keeps the layers from lifting as the needle rises.
Here is why that matters. When the needle pulls up after making a stitch, it tries to drag the fabric with it. The foot pushes back down, so the stitch forms cleanly. If you ever sewed with the foot lifted, you probably saw the thread bunch into a tangled nest underneath. That happens because raising the foot lever also opens the tension discs, so the thread loses its grip.
The foot works as a pair with the feed dogs. The teeth move the cloth, and the foot controls how firmly it is held. When one is off, the other cannot do its job.
How a Presser Foot Attaches: Shank Types

A presser foot attaches to the machine through its shank. Not every foot fits every machine, so this is the first thing to check before buying.
| Shank type | How it attaches | Notes |
|---|---|---|
| Snap-on | Foot clips onto a small bar when you press a lever | Common on many modern home machines. Fast to change. |
| Low shank (screw-on) | A holder is screwed to the ankle, and feet clip onto it | Very common on household machines. |
| High shank | Similar to low shank, but sits higher | Often found on older or semi-industrial machines. |
| Slant shank | Angled to match a slanted needle bar | Specific to some older machines. |
To see how this plays out, imagine you buy a set of cheap feet online and they will not click on. The usual reason is a shank mismatch. Before you order, look in your manual for the words “snap-on”, “low shank” or “high shank”, or measure the distance from the screw hole to the needle’s center. If in doubt, buy the brand’s own feet, or one that lists your exact model.
Types of Presser Feet and What They Are For
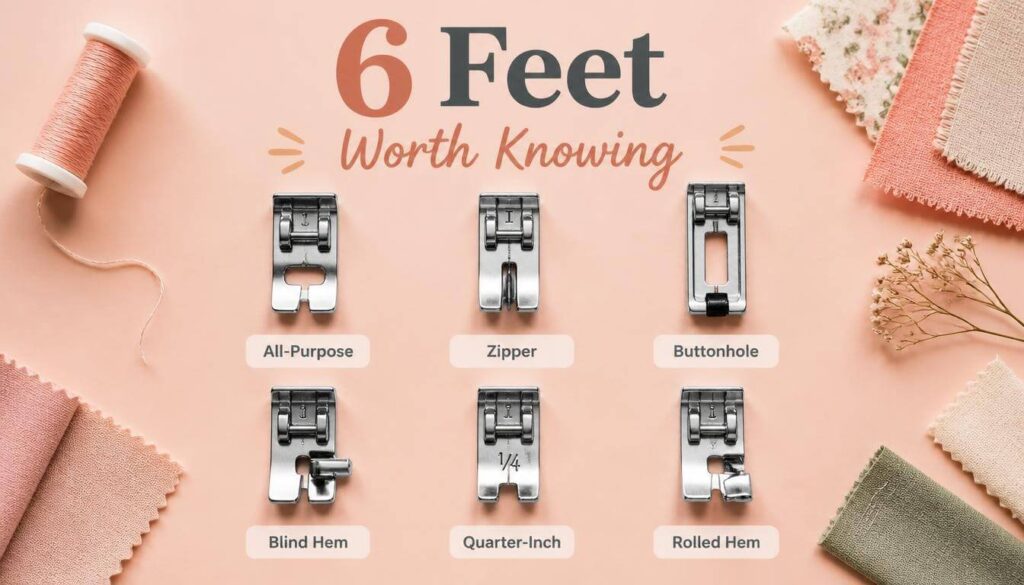
There are dozens of feet, but a handful cover almost everything. Most machines include the first three or four.
| Foot | Best for | Watch out for |
|---|---|---|
| All-purpose (zigzag) foot | Straight seams and zigzag stitches on most fabrics | Not ideal for zippers or thick layers |
| Zipper foot | Zippers and piping, because the needle sits close to the edge | Move the needle position if your machine allows it |
| Buttonhole foot | Automatic or guided buttonholes | Use a button-sized slot if the foot has one |
| Blind hem foot | Hems with nearly invisible stitches | Needs practice to set the guide |
| Quarter-inch foot | Patchwork and quilt piecing with a precise seam | Straight stitch only |
| Rolled hem foot | Narrow, neat edges on lightweight fabric | Works best on thin, crisp cloth |
| Satin stitch (open-toe) foot | Dense decorative stitches, appliqué | Clear view of the stitch line |
| Darning or free-motion foot | Free-motion stitching, darning, quilting | Feed dogs are lowered, so you guide the cloth |
| Non-stick foot | Leather, vinyl and sticky fabrics | Smooth glide, but can slip on very thin cloth |
For thick quilts or slippery layers, a walking foot has its own set of feed teeth on top. That one has a full guide of its own in what is a walking foot, so we will not repeat it here.
Real Example: Sewing a Zipper With the Wrong Foot
Picture a skirt with a zipper. With the all-purpose foot, the foot’s toe is too wide, so the needle cannot get close to the zipper teeth. Your stitching wanders away from the edge, and the zipper puckers.
Swap in the zipper foot, and the narrow toe lets the needle run right beside the teeth. You get a straight, close line. The only change was one small piece of metal.
Step-by-Step: How to Change a Presser Foot

Changing a foot takes about a minute once you know the system.
- Switch off and unplug the machine. This stops the needle from moving by accident.
- Raise the needle by turning the hand wheel toward you until the needle is at its highest point.
- Lift the presser foot lever so the foot rises off the plate.
- For a snap-on foot, press the small lever behind the shank. The foot drops off. Place the new foot under the shank, line up the pin with the groove, and lower the lever until it clicks.
- For a screw-on foot, loosen the side screw with the small screwdriver, slide the old foot out, line up the new one, and tighten.
- Lower the foot lever and turn the hand wheel by hand for one full stitch. Check the needle clears the opening without touching the foot.
That last check is the one people skip. A foot with a narrow opening, such as a straight-stitch or zipper foot, will be hit by the needle if you leave the machine on a wide zigzag.
Presser Foot Pressure: When to Adjust It
Many machines have a dial or screw that changes how firmly the foot presses. The default is a good middle setting for medium-weight fabric. Pressure is mainly useful for very light or very heavy cloth, as Threads Magazine’s sewing machine features guide points out.
A simple way to think about it is this: heavy or spongy fabrics need a lighter touch, and slippery thin ones can need a bit more. Check your manual, since the dial location and scale differ by brand.
For example, if a thick fleece layer keeps stretching and rippling as it passes under the foot, try reducing the pressure by one step. Sew a test seam each time you change it.
Quick Troubleshooting Checklist: Presser Foot Problems
| Symptom | Likely foot cause | What to try |
|---|---|---|
| Thread nest underneath | Foot lever was up while sewing | Lower the lever, rethread the top thread |
| Needle strikes the foot | Wrong foot for stitch width | Switch to a zigzag foot or narrow the stitch |
| Layers shift against each other | Top layer is dragged by the foot | Try a walking foot |
| Fabric ripples or stretches | Pressure too high | Lower the pressure dial one step |
| Fabric sticks to the foot | Vinyl, leather or coated cloth | Use a non-stick foot |
| Foot rattles or tilts | Loose screw or not clicked in | Reattach and tighten |
If the fabric is not moving at all, the foot may not be the cause. See why your machine is not feeding fabric for the full list.
Helpful Tips for Using Presser Feet
- Keep your feet in a labeled box. They are small and easy to lose.
- Match the foot to the task before you start, not halfway through a seam.
- Test on scraps. A two-minute test beats an unpicked seam.
- Learn your manual’s foot chart. It lists which foot goes with which stitch.
- Replace bent or cracked feet. A warped sole lets fabric slip.
Common Mistakes With Presser Feet
- Sewing with the foot lifted. The tension discs open and the thread tangles.
- Using a foot that does not fit the stitch. A narrow foot with a wide zigzag breaks needles. See why needles keep breaking.
- Buying feet without checking the shank. Always match the type first.
- Leaving the pressure high. Heavy pressure marks soft fabric and stretches knits.
- Forgetting to check clearance with the hand wheel before sewing at speed.
When to Call a Professional
Most foot issues are simple. Visit a repair shop if the foot holder is bent, the screw keeps working loose, or the foot hits the needle bar even after a correct setup. These can mean the holder or needle bar is out of alignment. How to repair a sewing machine shows what is safe to try first.
FAQs
What is a presser foot on a sewing machine?
A presser foot is the part that holds fabric flat against the feed dogs while you sew. It keeps the cloth steady so the needle forms even stitches. Different feet are made for zippers, hems, buttonholes and other special jobs.
What is the presser foot lever for?
The lever raises and lowers the foot. Raise it to place fabric under the needle, and lower it before you sew. Lowering it also engages the thread tension, so always sew with it down or the thread may bunch up.
Are presser feet universal?
No. Feet depend on your machine’s shank type, such as snap-on, low shank or high shank. A foot made for one type will not fit another. Check your manual or your model number before you buy a new foot.
How do I know which presser foot to use?
Start with the all-purpose foot for regular seams. Switch to a zipper foot for zippers, a buttonhole foot for buttonholes, and a walking foot for quilts or slippery layers. Your manual’s stitch chart tells you which foot each stitch needs.
Can I sew without a presser foot?
Technically yes, but it is not a good idea. Without the foot, fabric will not feed evenly, thread tangles easily, and your fingers are close to a moving needle. Always use a foot, and keep it down while sewing.
Why is my presser foot not pressing down?
Check that the foot lever is fully lowered and the foot is clicked into its holder. If it still floats, the pressure dial may be set too low, or the holder could be loose. Reattach the foot and test again.
Conclusion
So, what is a presser foot? It is the small part that holds your fabric steady and works with the feed dogs to move cloth evenly under the needle. Match the right foot to the job, check your shank type, and keep the lever down while you sew. Most beginner problems get easier from there.
To see where the presser foot sits among all the other pieces, review the full guide to the parts of a sewing machine.
Ready to start a project with your new foot? Plan your fabric first with the fabric yardage calculator so you buy the right amount.